
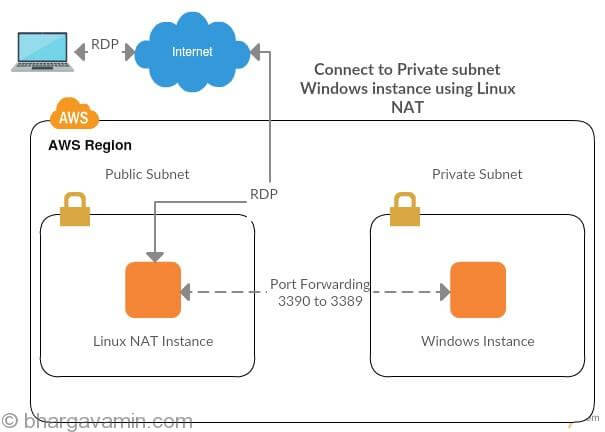
In this article will we create a NAT instance in Amazon VPC in just 5mins.
This blog is a how-to-do of NAT vs Bastion article, as this topic was requested by many readers personally.
Quick overview of tasks :
- Create a VPC with two subnets (Public and Private subnet)
- Launch Instance in public subnet.
- Modify the security groups (Inbound & Outbound rules) for NAT instance launched in public subnet.
- Use NAT instances AMI (Amazon Machine Image) from AWS Community AMI’s
- Edit routing tables
- Disabling Source/Destination Checks for NAT instance.
So lets get started… make sure you follow each step carefully as it might create problem achiving desired results.
Step 1 : Create VPC with private and public subnet
- Go to https://us-west-2.console.aws.amazon.com/vpc/home
- Click on Create VPC
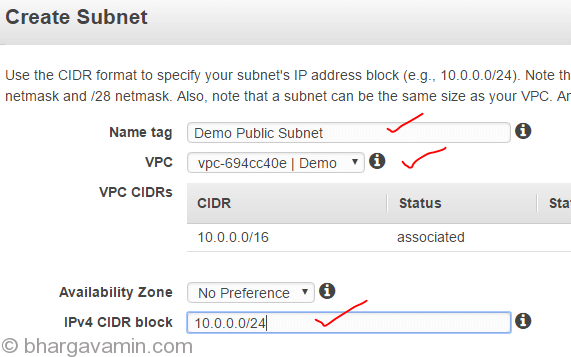
- Enter Name and IPv4 CIDR Block (10.0.0.0/16), keep everything else as it is.
- Once VPC in create navigate to Subnet section and create two subnets
Public Subnet with following configs :
And Private subnet with following configurations :

- Create an Internet Gateway and attach it to your VPC

Step 2 : Create seperate routing tables for each public and private subnet
- Create seperate routing table for public and private subnet, navigate to Route Tables section
Create Public Route Table:

Create Private Route Table:

- Add Internet Gateway to Public Route Table

- Add NAT Instance ID in Private Routetable (This is to be done after step 3 / once you have launched NAT instance)
NOTE : Do to same thing for Private Route tables with one change, instead of Internet Gateway you’ll select Instance ID of NAT instance which you will launch in Step 3
- Next step is to associate subnets with Route tables
Select Routing table and go to Subnet Association tab to add Public Subnet to Public Routing table, repeat the same for Private aswell.

Step 3 : Launch Amazon NAT community AMI
Launch an instance with custom Amazon NAT AMI in Public Subnet as shown in image below..
Step 4 : Configure private subnet to route traffic via NAT instance
Once the instance is in running state, you can now modify Private Routing Tables and point all the traffic via NAT instance.

Step 5 : Disable Source/Destination Checks for NAT instance
This is last step where you will disable source/destination check on NAT instance which you lauched in Step 3

That’s it!
You can now check the connectivity by logging any of instance in private instance. Before you try that, ensure that the security group has Inbound and Outbound port 80 open on private instance aswell as NAT instance.
This way all your traffic will now route through NAT instance, you can also use NAT Gateway which is more costly but then it removes single point of failure of having a NAT instance through which all traffic is routed.
I hope this helps!
-Bhargav


Social Profiles